|
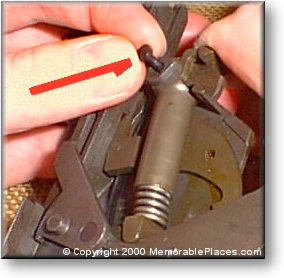
The trick to this step is to compress the
hammer spring while at the same time lining up the
two trigger guard housing holes with the hole in
both ears of the hammer spring housing and the hammer
itself. It can be a little tricky.

The best way we have found to do this is
to make sure the hammer stays in and upright position
while making a 'C' shape with the right hand over
and around the top of the assembly as a whole. This
allows you to compress the spring and roughly align
parts with your right hand and allows you to make
little adjustments with your left hand.
When all of the holes are aligned drop in
the trigger pin.
Usually it takes a little fighting to get
the trigger pin in place but if you work from left
to right centering each piece it usually goes pretty
well.
The final step in the process
of putting the trigger group together is to functionally
test its operation to assure that I have it all
back together correctly.
Final Trigger
Group Re-Assembly Page

|