|
The Operating rod goes in next. Before
placing it on the rifle however - lubricate the
area where the bolt lug will ride and underneath
the 'flat' area just behind where the spring is
inserted. This is the area that comes in contact
with the bottom of the barrel.
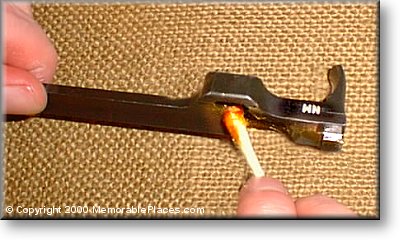
Now gently insert the
Operating Rod carefully into the Gas Cylinder. Hold
the Oprod at the most shallow angle you possibly
can in order to make insertion easier and to avoid
any chance of bending it.
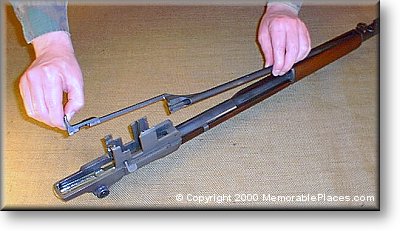
When the Operating
Rod is in the correct general position turn the
rifle right-side-up and hook the handle end of the
rod to the bolt and into the receiver.
To do this simply slide
the bolt to the rear so that the lug of the bolt
is just barely under the forward edge of the rear
sight cover spring. I then gently rotate the operating
Rod up and into position.
To fasten the Operating
Rod in - thread the bolt lug into the side of the
Operating Rod and with a firm right, inward, and
down pressure push the Operating Rod into the notch
below the windage knob.
Then tilt the weapon
forward and backward. If the Bolt and Operating
Rod do not slide easily as a unit (using the force
of gravity alone) then something is out of place.
Once the operating
Rod is in position assemble the smaller parts of
the mechanism.
Next Page

|