|
After you have the rifle together
do the following tests to make sure you have the
M1 Garand back together and it is functioning properly.
We do not pretend that this is a full list of all
of the tests that should be done. Please
get training from a professional and do not rely
on these pages for safety information.
When we have finished
reassembling the weapon w do the following checks:
- Try to pull the
trigger group out without opening the trigger
guard. (It should not move.)
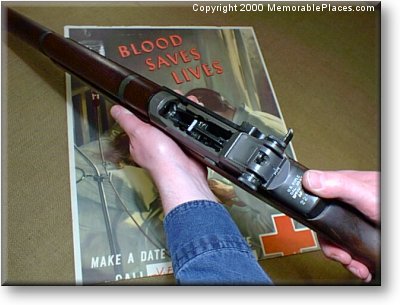
- Pull the Operating
Rod all the way and make sure that it locks in
the rear position. (I also do an extra check to
make sure the weapon is not loaded here.)
- Observe and make
sure that the Follower & Follower Slide Assembly
have moved to the upper position.
- Release the Operating
Rod making sure it moves forward smoothly.
- Make sure the Operating
Rod closes fully and the bolt rotates and locks
into place.
- Engage the safety
and try to pull the trigger. (The hammer should
not fall.)
- Release the safety
and pull the trigger, (remember I checked the
chamber for a cartridge above). The hammer should
fall.
- While keeping pressure
on the trigger so that it stays to the rear (fired
position) I will pull the Operating Rod back and
release it. The hammer should not fall.
- I will now release
the trigger and pull it again. The hammer SHOULD
fall at this point.
And that's all there is to it!

|